About 7-Day Free Trial + Lifetime Purchase
The app uses a free ($0) in-app purchase called “7-Day Free Trial” to track the start date of the trial period on your Apple account across devices. After the trial period ends, you will not be charged automatically.
To unlock the app forever, tap the Purchase / Restore button and tap the large purchase button and confirm the purchase with Apple. This can then be restored on any devices where you are logged into your Apple account.
How To Use Like A Frame

Parts of a Like A Frame composition.
Like A Frame works a little differently to most “photo border” apps for a good reason. It’s does a lot more than a simple photo border.
Canvas
The Canvas is where everything is drawn to and can be sized to any aspect ratio with any background colour you like with textures and subtle shading. The canvas is the stage in which all of the layers are drawn. It can also be made translucent or transparent (saved as a PNG instead of a JPEG).
Layers — Photos & Text
Layers can place either a photo or block of text onto this canvas. All canvases start with at least one photo layer. Up to four photos with their own frame design can be added to a single canvas with up to ten layers in total including anywhere from 1-9 text layers depending on how many photo layers exist.
Photo Layers
Each photo layer can have a simulated photo frame of any thickness and colour, with an optional matte between the frame and the photo itself, also of any thickness and colour. With framed photos, you can add rounded corners, a shadow outside and inside the frame, a 3D matte bevel around the photo. You can also crop photos.
Text Layers
Text layers is where you can add blocks of text. Each text layer can choose a font family, font styling and other properties like line spacing and colour. You can type emojis as well! Add text to enhance your composition and to use in marketing materials as well.
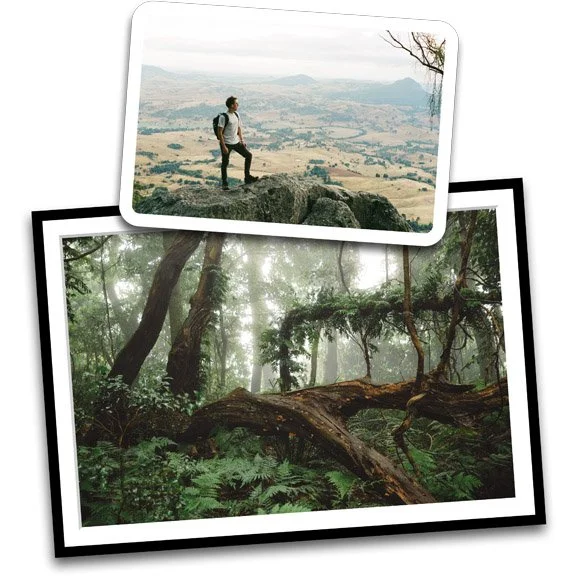
An Example!
Before explaining all of the different settings in Like A Frame, let’s take a look at a real world example of a single-layer composition made with the app. You can see labelled each component of the composition, from the canvas itself (square format) to the framed photo with all the details such as border, matte and shadows. Everything here is fully customisable.
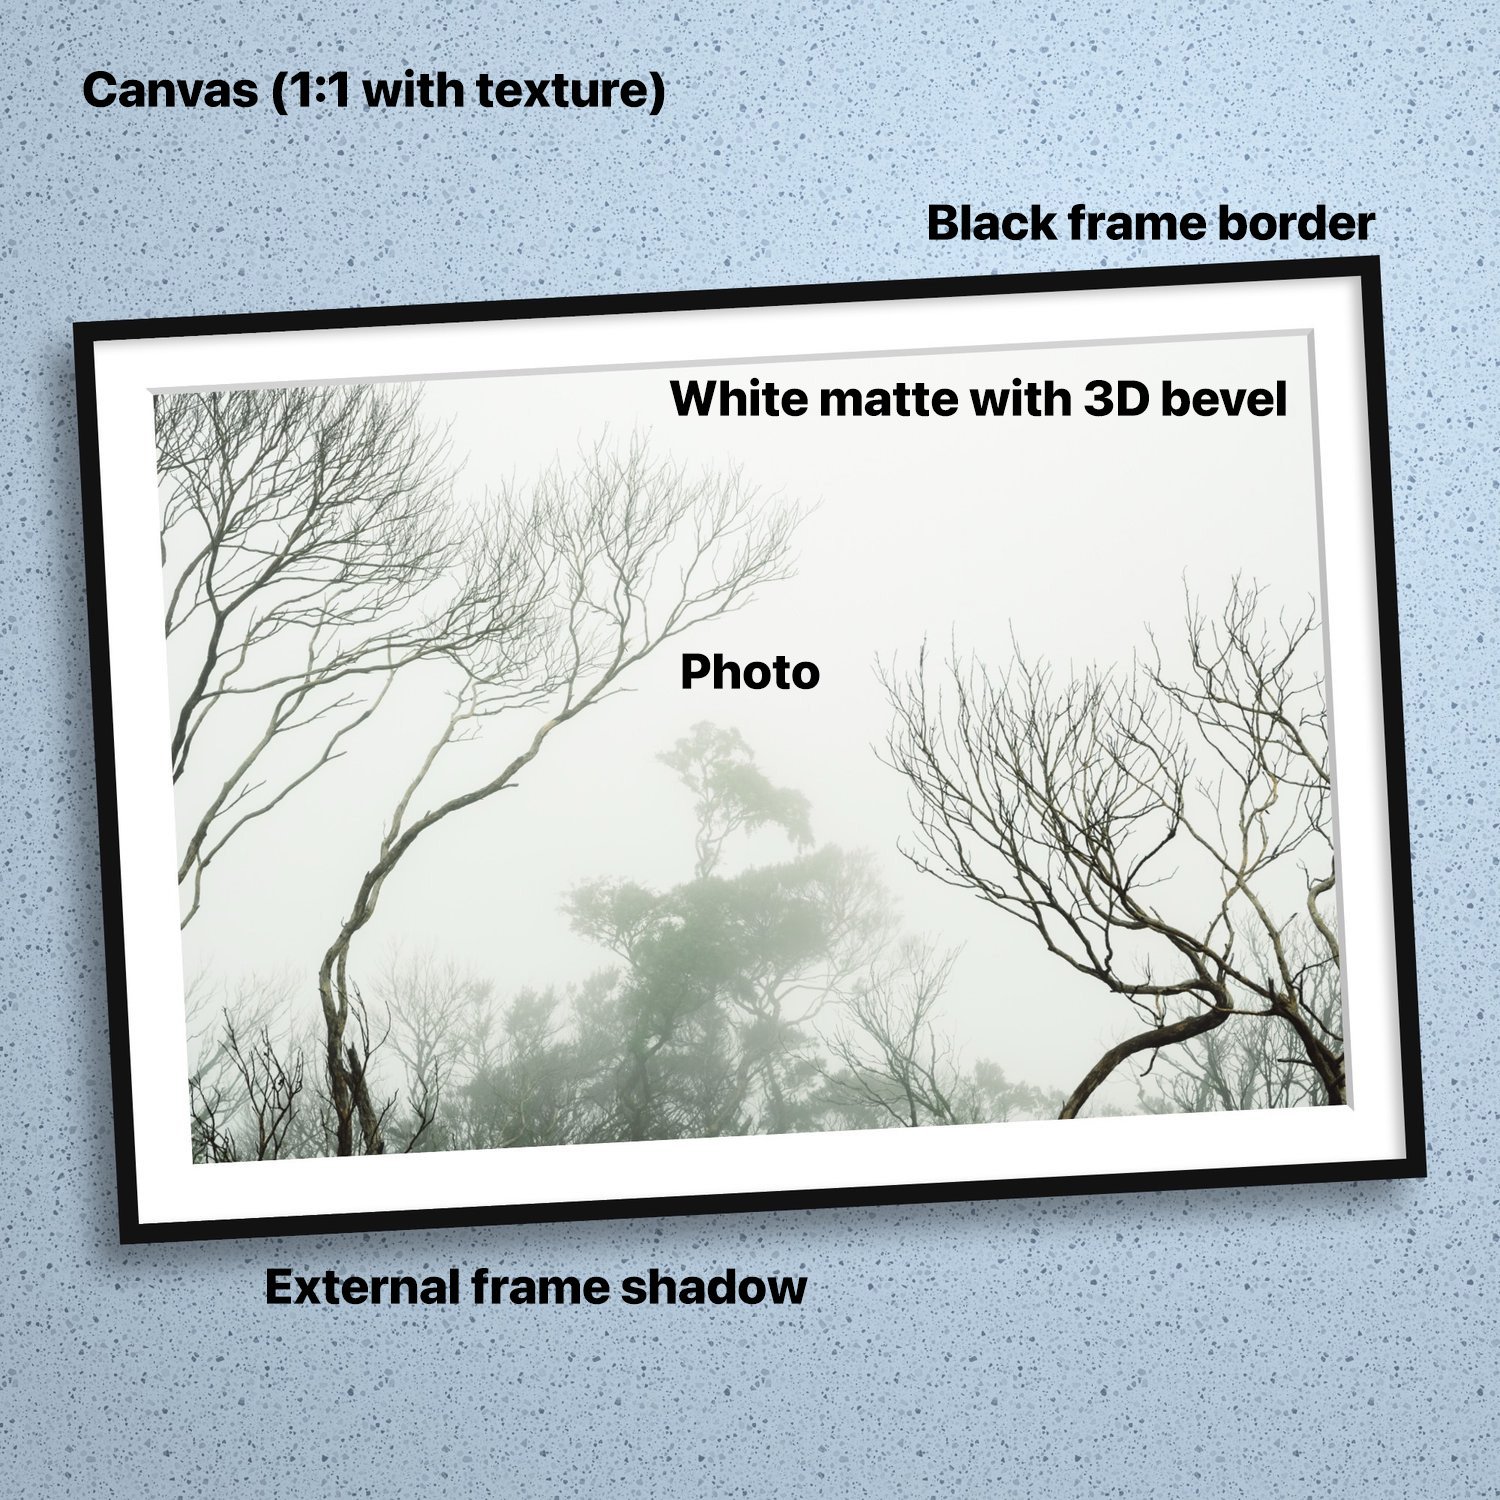
Make sense? The photo has a ratio of 3:2 and generates a frame around it, and that layer sits on the 1:1 (square) canvas that is the extent of the exported image. Like A Frame makes it all work effortlessly and in any configuration you desire, and you can export this all at different resolutions for different purposes.
Relative Coordinate System
Like A Frame makes all of this work by storing everything in relative coordinates. Photo position, border width, matte size etc are all stored in units between 0.0 and 1.0. When it comes time to export, it’s all converted into real coordinates at any size. This also means that the canvas can be changed at will with only a few tweaks needed afterwards.
The Tools Menu & Editing
With the right options at your disposal, the sky is the limit. The Tools menu in Like A Frame has an array of options which control the look of your composition, from the canvas ratio to frame size and even photo cropping. Most settings respond to touch and dragging gestures. Pictured is the iPhone menu. On iPad, this is a toolbar.
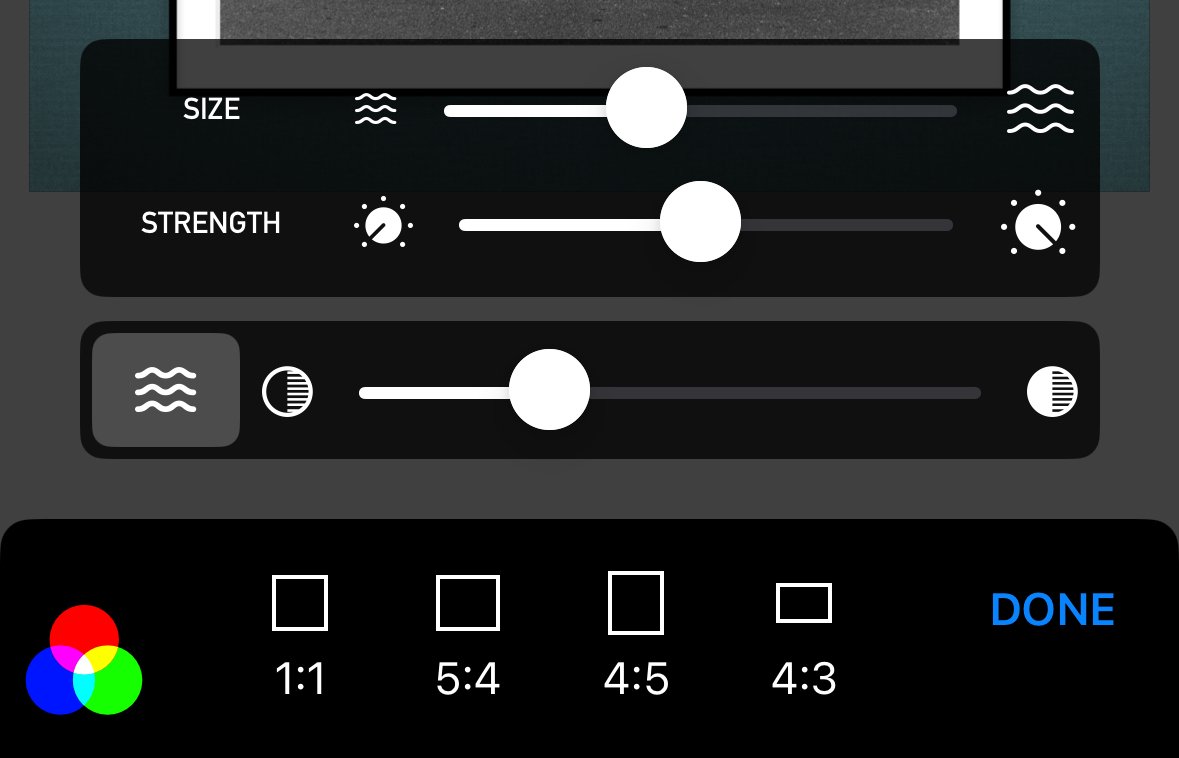
Canvas ratio, colour and texture settings
Canvas
This option sets the background canvas ratio, or the ratio of the whole composition. It also sets the background colour using the colour picker (red, green and blue circles button).
Canvas Texture / Shading
On the Canvas setting, you can also add a textured background, change its intensity and scale settings and also adjust the shading of the background altogether. By pulling down the shading slider, you
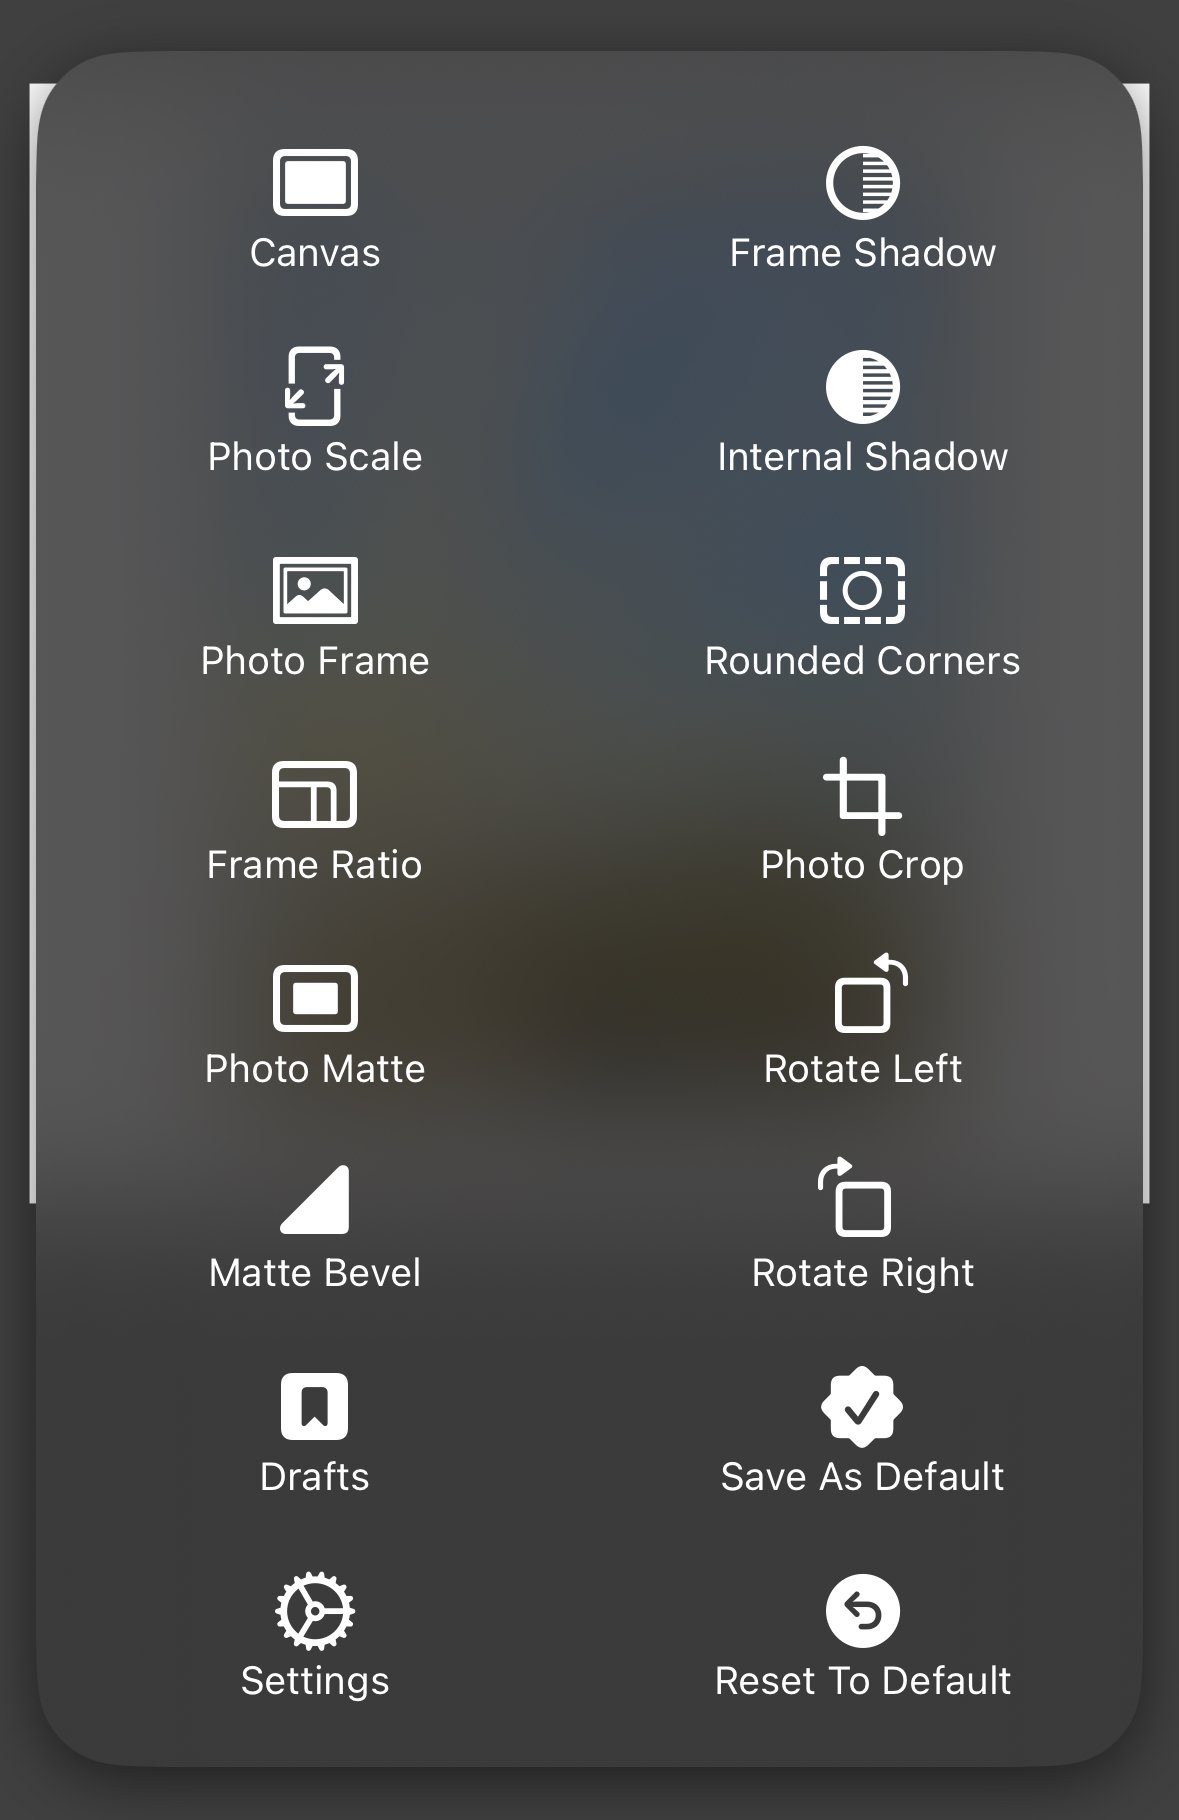
Photo Scale
Changes the scale of your photo within the canvas using this option, from 5% to 100%.
Photo Frame
Adjusts the thickness and colour of the photo frame that surrounds the photo and matte (if set).
Frame Ratio
Sets an optional aspect ratio for the photo frame independent of the photo itself.
Photo Matte
Adjusts the width and colour of the matte that sits between the photo and the photo border.
Matte Bevel
Adjusts the size of the 3D matte bevel edge around the photo (when used with a Photo Matte). The angle of light and colour is determined by the Internal Shadow setting.
Rounded Corners
Want to round off the corners of the photo, matte and border? Use this setting. If you set your Photo Crop to the ratio of 1:1 and set Rounded Corners to 100%, your photo will be framed as a circle.
Frame Shadow
Adjusts the size, colour and transparency of the shadow to cast behind the entire frame. Move the shadow around by tapping and dragging when in the Frame Shadow setting.
Internal Shadow
Adjusts the size, colour and transparency of the internal shadow to cast inside the frame over the photo and matte. Move the internal shadow around by tapping and dragging when in the Internal Shadow setting.
Photo Crop
Use this setting to crop your photo to a different aspect ratio. Tap and drag to move the crop position back and forth.
Rotate Left & Rotate Right
If your photo needs to be rotated clockwise or counter-clockwise by 90 degrees, these options allow you to do so.
Reset To Defaults
If you wish to reset your current settings to the default, tap this button.
Save As Defaults
To save your current settings as the default for all new Frameable compositions, tap this button.
Saving Presets & Drafts For Later

Presets (wand icon)
If you’ve created a photo or text layer style you would like to use again, save it as a preset. You can also share them.
This will apply the same individual layer settings to any photo or text layer you choose in the future. Save different presets for publishing to different platforms or for different purposes, such as your feed or an Instagram Story preset.
Drafts (bookmark icon)
If you need to save your existing composition, layers and all to restore later on or use as a template, use the Drafts feature. This will store the entire composition and allow you to load it again in the future. You can also share drafts as a .lfdraft archive to share with other devices or your friends. These contain the images you have in your composition and therefore they may be large in size.
Exporting & Settings

Once you’re finished creating your composition, tap the Next button in the top right of the editor. You’ll be presented with a few options on the export screen.
To save your composition to your iOS Photos library, tap Save. You can adjust the export resolution before exporting as well (on the longest side, horizontal or vertical).
Alternatively, if you wish to share your composition straight to another app or service, simply tap Share. You’ll be presented with the sharing options according to your own device’s platform.
Settings
Exporting and sharing will save your composition at different resolutions depending on your preferences. By default, these are both set to 2000 pixels on the long side.
To change these settings and others, tap the Settings buttons, located on the Home and Editor screens.